
Dried and preserved flowers are, without a doubt, a game changer. Whether you use them for home décor, gifts, weddings, or other events, they’re an excellent investment. With various flower-drying techniques, you can easily find one that appeals to you the most.
You may have a few questions regarding this unique process if you’ve never dried flowers before. How long do dried flowers last? What are the different drying methods? How can you use dried blooms? Continue reading this comprehensive guide to drying out flowers for answers to all of these questions!
Benefits of Drying Flowers
With their significant life span, low maintenance, and high functionality, the benefits of dried flowers are truly unmatched. Let’s explore the pros of drying your flowers below.
1. Long-Lasting
One of the largest advantages of dried flowers by far is their longevity. Provided the original blooms are of good quality and treated correctly, dried flowers can last up to several years. While a bouquet of fresh flowers is lush and beautiful, most varieties only last roughly one or two weeks.
The good news is that once your bouquet starts to wilt, you can dry it to preserve its original beauty while bringing out a more natural, organic facade. Gone are the days of mourning your once fresh and colorful bouquet — you can now delight in its beauty for potentially years to come.
2. Low-Maintenance
If you enjoy the aesthetic appeal of flowers but have minimal desire to water and care for plants, dried flowers are the way to go. As the name suggests, dried flowers are dry. They never require watering or any additional treatment to maintain their integrity. Whether your schedule is jam-packed or you simply don’t enjoy keeping up with flower maintenance, dried blooms are a lovely low-maintenance alternative.
3. Highly Versatile
Like fresh blooms, dried flowers come in a wide range of shapes, sizes, and varieties. There are many unique combinations to choose from and various ways to use them. Whether pressing and framing them for a wall accent, using them for wedding or event décor, or giving them as a gift, there are endless ways to get creative with dried flowers.
The flexibility of switching up the arrangement is another glowing benefit of dried blooms. In addition to rearranging or repurposing the existing bouquet, you can also add or subtract flowers and grasses as desired. The possibilities are truly limitless when it comes to dried flowers.
4. Available Year-Round
Thanks to dried blooms, you don’t have to wait until spring or summer to acquire your favorite flower. While certain fresh varieties like lilacs and peonies are only available seasonally, dried flowers are available throughout the year. No matter the style or variety you desire, you won’t have to search long to find a gorgeous dried arrangement.
Methods for Drying Flowers
How do you dry out flower bouquets? There are several methods, so you can choose one that works best for you. Below are five methods for drying your flowers:
1. Air Drying
Air drying is the most traditional — and time-consuming — flower drying method, as it relies heavily on the surrounding environment. It can take anywhere from a couple of weeks to a month for flowers to dry fully without any type of accelerant.
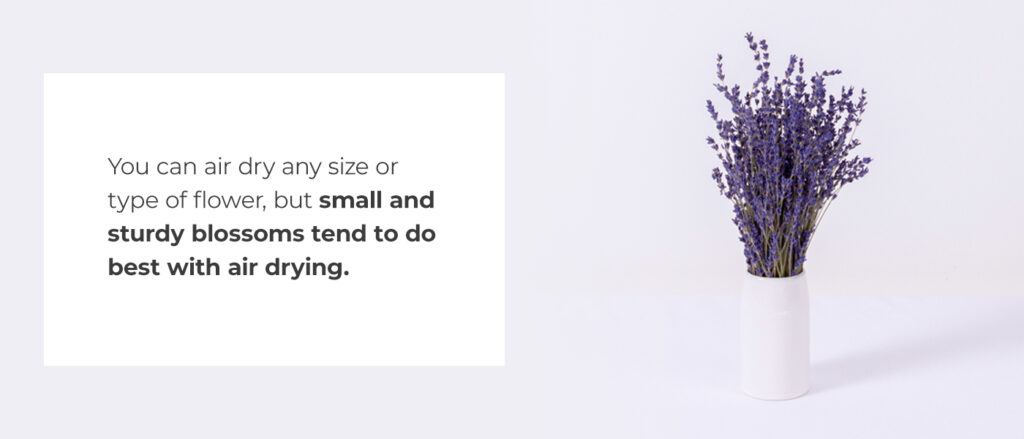
You can air dry any size or type of flower, but small and sturdy blossoms tend to do best with air drying. They have low water content and hold up well during the lengthy drying process. Here are some varieties you might consider air drying:
- Lavender
- Hydrangea
- Amaranth
- Baby’s breath
- Strawflower
- Celosia
To air dry your blooms, you can bind a series of small bouquets with a rubber band or hang the flowers individually. Find a dark, dry place with good air circulation, like a closet or attic. Secure the bottom of the stems to a hanger with string or unused dental floss so they can hang upside down to dry.
Once you’ve prepped the flowers, simply sit back and wait for nature to do the remaining work. The result makes a lovely decorative accent or table centerpiece for your home.
2. Microwaving
If you’re wondering how to dry flowers quickly, this method is for you. It involves heating your blooms in a microwave to dry them out. If you don’t have the time or patience to dry your flowers the traditional way, a microwave is a quicker alternative. Keep in mind, however, that traditional air drying maintains the color and shape of your blooms more effectively than microwaving.
Remember that certain varieties like sunflowers tend to shrivel easily. Furthermore, light-colored blooms can change to a burnt or taupe hue when microwaved for too long. Large, dense blooms with open-faced petals — such as tulips, roses, chrysanthemums, and zinnias — tend to withstand the heat of a microwave the best.
Here are steps for microwaving your flowers:
- Prep your container: Find a microwave-safe container large enough to hold your flowers. Don’t use a dish you plan to microwave food in after this project. Cover the bottom of the container with some silica gel. Lay the blooms blossom up in the gel, then pour some more gel gently over the petals — be careful not to flatten them.
- Heat and check your flowers: Place the container uncovered in the microwave. Microwave time can vary by type of flower, so this step may require some trial and error. Start the microwave on a level or two above defrost and heat for around 2 to 5 minutes. Check your flowers about every 30 seconds or so, increasing the time and heat as needed.
- Remove the container and let sit: Open the microwave and cover the container once the flowers have dried completely. Take the covered container out of the microwave. Open the top about a quarter of a centimeter, then let the container sit for about 24 hours.
- Polish your flowers: Clean the gel off the petals using a fine-tip brush, then mist the flowers with an acrylic spray. Your flowers should now be ready to display proudly!
3. Desiccant Drying
This method involves submerging your flowers in a bed of desiccant — a moisture-removing substance — such as silica gel or kitty litter, then leaving them to sit for a few weeks. Bigger or more delicate blooms should be stored in a sealed container.
Varieties such as pansies, lilies, peonies, daisies, and dahlias tend to hold up well when dried in a desiccant. Like air drying, the desiccant drying method takes longer than microwaving your flowers, but it also preserves their color more effectively.
4. Baking
Like microwaving, baking is a convenient way to speed-dry your flowers. This method involves heating your flowers in the oven at a low temperature for a couple of hours.
Baking is a quick way to dry your blooms, but you may lose some color and petals in the process. Large and thick blooms, like the flower varieties we mentioned with microwaving, tend to hold up best in the oven, while small and thin blooms can dry and shrivel quickly. Below are the steps for baking your flowers:
- Prep your oven and flowers: Set your oven to a low temperature, about 150-200 degrees Fahrenheit. Remove any loose leaves or foliage from the blooms.
- Bake the flowers: Spread your flowers evenly on a baking rack placed over a cookie sheet, then let them bake for about two hours. Check them periodically to ensure they aren’t burning.
- Remove and let cool: Take the flowers out of the oven when they’re completely dry, then let them cool before using them.
5. Pressing
Pressing blooms involves using a heavy object to squeeze out the moisture. This is an effective method to dry flowers for artwork and crafts, such as stationery, framed wall art, and coasters. Smaller flowers with a single layer of thick petals tend to mesh best with the pressing method — specifically pansies, daisies, violas, and lavender sprigs.
Pressing your flowers is simple — all it takes is a flat, heavy object like a large book, along with some wax or parchment paper. Here are the steps to follow:
- Prep the flowers: Lay your flowers between two sheets of wax or parchment paper on a table or counter. Another option is opening a thick, large book to the middle, then lining the pages with non-stick paper.
- Apply pressure: Lay a flat, heavy item on top of the paper, or gently close the big book you’re using to dry your flowers. Let your pressed flowers sit in a dark, warm, and dry area.
- Replace the paper: Check your flowers after a week or so. Replace the used parchment paper with fresh paper — just be careful when doing so, as the blooms will be in a highly delicate state by then. Repeat this process until your flowers have dried completely. The complete process may take up to a month.
How to Use Dried Flowers
As discussed previously, one of the biggest benefits of dried flowers is their high versatility. With their endless uses, you’ll surely find a way to incorporate them into your next project, craft, or event. Below are a few of the many ways you can use dried blooms.
1. Wedding Flowers
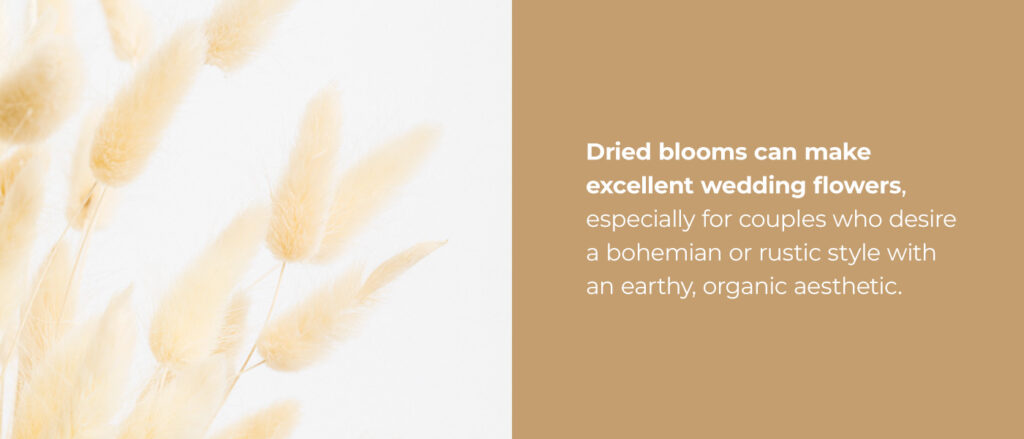
Dried blooms can make excellent wedding flowers, especially for couples who desire a bohemian or rustic style with an earthy, organic aesthetic. Dried flowers maintain their color and shape longer than fresh flowers, which makes them a reliable and appealing wedding day option.
You can use them for bridal or bridesmaid bouquets, flower crowns, boutonnieres, or reception table centerpieces. If you’re planning to use fresh blooms instead, you can always dry and preserve your wedding flowers for a special keepsake from your big day!
2. Potpourri
Drying your flowers is a great way to make potpourri. You can use dried blooms to create a colorful, fragrant blend of petals that looks and smells great in your home. You can make the scent last longer with a fixative like an orris root or by adding some essential oils.
3. Centerpieces
Dried blooms make a beautiful focal point for a centerpiece. Whether it’s filling a large clear bowl or basket with your favorite dried varieties or assembling them into a vase, dried flowers can add color and character to any side table or dinner setting.
Once all of your blooms are in place, feel free to get creative with embellishments like ribbon, pampas grass, eucalyptus, or fabric to complete the look of your centerpiece. Another tip is to choose more fragrant flowers for around the house but less aromatic ones for the dinner table — that way, they won’t interfere with the aromas from the food.
4. Food and Drinks
Believe it or not, you can use dried flowers to make cakes and other desserts, as well as teas. You might consider experimenting with your own tea blends, trying out different green or black teas, dried flowers, and herbs to see what ingredients blend well. Just be sure to choose edible flower varieties that are safe for consumption!
5. Crafts and Artwork
Pressed flowers can be used for numerous DIY projects like homemade cards, wall art, candles, stationery, and scrapbooks. Whether you’re making a gift for a loved one or trying out new crafts for your own pleasure, dried blooms offer an array of possibilities!
Tips for Drying Flowers

We hope you’ve enjoyed learning about the various methods and uses of dried blooms. To wrap things up, here are some additional tips to remember when drying your flowers:
- Avoid direct sunlight and moisture: If you’re air drying your flowers or soaking them in desiccant, remember to keep the blooms out of direct sunlight. Light can cause their color to fade. Additionally, choose a humidity-free location so your flowers can dry more effectively. A slight cross-breeze from a low fan setting or open window can also help accelerate the drying process.
- Be patient: Even if you choose a faster method like baking or microwaving, keep in mind that drying your flowers requires time and patience. Your blooms may not turn out exactly how you expected on the first try, and that’s okay! Drying flowers is an art and will often take some trial and error to perfect.
- Choose high-quality flowers: When choosing fresh flowers to dry, you’ll want to make sure they’re sturdy, healthy, and high-quality with no signs of damage or wilt. That way, they’ll be able to withstand the drying process, and your final product will look as beautiful as when they were fresh! Thankfully, we have a stunning selection of blooms to choose from at Ode à la Rose.
Browse Flower Bouquets From Ode à la Rose
Now that you’ve learned how to dry flower bouquets, you may be inspired to incorporate their natural beauty into your own space. At Ode à la Rose, we have a gorgeous variety of dried arrangements to choose from. Alternatively, choosing one of our fresh flower bouquets — like roses, tulips, or peonies — means you can try out one of the above drying methods for yourself. That way, you can marvel at their beauty even longer!
Whether you prefer the earthy aesthetic of dried flowers or lush and colorful fresh blooms, we have a bouquet for you. Browse our flower arrangements and order yours today!